Seven Stars of the Harvest Season
Seven Stars of the Harvest Season
By Jessica Prentice
 Jessica Prentice, Maggie Gosselin, and Sarah Klein created the Local Foods Wheel to help us all enjoy the freshest, tastiest, and most ecologically sound food choices month by month. Here are Jessica’s seven summer favorites. You can learn more about the Local Foods Wheel and the group’s other ventures at localfoodswheel.com.
Perhaps the most alluring local shell beans are those being grown by local farmer Annabelle  Lenderink at La Tercera Farm. She has a stand on Saturdays at the Berkeley Farmers’ Market during the harvest season only, and it is really hard not to stop and ooh and aah over her heirloom squash, chicories, and shelling beans. The point—of course—is not just to ooh and aah but to make a commitment and take something home. Shelling beans are a great choice. What you are committing to is this: You have to shell them! This is best done with a friend, sitting down, hours or even days before you plan to cook them. During the harvest season you will find familiar shell beans such as cranberries and black-eyed peas and more exotic ones like Black Coco or Dragon’s Tongue. If they are very fresh they usually won’t need soaking. If they are well-dried then by all means soak them, and then try cooking them very slowly. In Italy this is classically done in a ceramic bean pot set next to the coals of a fire. Although less rustic, a slow-cooker can achieve a similar effect, where the gentle heat renders the beans absolutely tender but still beautifully intact.
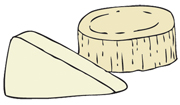 What would the harvest season be without fresh cheeses like mozzarella, chèvre, fromage blanc, or feta to go with our tomatoes, peppers, cucumbers, or eggplant? Impoverished indeed! Although they’re available year-round, this is the time of year when the flavors in these lightly salted, fresh-flavored cheeses from bovines and ovines really shine. I love to see them in slices on platters, crumbled on salads, or barely baked. They love the harvest season’s fresh delicate herbs, too: basil, dill, and mint. They can be savory or sweet—try pairing with honey, figs, grapes, or pomegranates!
Abalone is a Bay Area local wild food par excellence. Once a staple of the local indigenous diet, it has become rare enough to 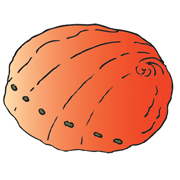 warrant harvesting restrictions: Wild abalone is not available commercially, and sport harvesting is strictly regulated and restricted to certain months in spring and autumn. So, in order to get your hands on some abalone, you can either seek out farmed abalone (it is being sustainably grown in the Monterey Bay), or learn how to catch and clean it yourself, or make friends with an experienced diver. With its rich flavor and unique texture, reminiscent of calamari, it’s well worth the effort to obtain. Once in hand, the abalone can be eaten fresh or frozen—though there seems to be some debate about whether freezing ruins the texture, or actually improves it. I have eaten more frozen abalone than fresh, and have no reason to complain about the taste or texture—I love it! My usual way to eat abalone is to slice into thin pieces, then pound the pieces even thinner, then dredge in flour, salt, and pepper, and pan-fry before serving with a squeeze of lemon and a sprinkling of parsley.
 Tomatillos have a relatively short season, so don’t pass them by when you find them! They are used extensively in Mexican cooking, and are essential for making salsa verde. Although they’re often called tomates verdes in Spanish, and belong to the Solanaceae family (aka nightshades), tomatillos are not actually tomatoes. They come in various colors, including pale green and deep purple, usually covered by a papery husk that peels off to reveal the sticky fruit beneath. You’ll want to rinse the sticky off before use, which can include fire-roasting, sautéeing, simmering, and raw preparation. Tomatillos are usually mashed or puréed into a sauce that often also incorporates fresh lime juice, some kind of green peppers or chile, and fresh cilantro. Salsa verde is terrific on enchiladas, and goes perfectly with pork, chicken, beans, and tortillas. If you haven’t ever worked with fresh tomatillos, I encourage you to try. They are easy and rewarding!
Late summer is when the heat produces the juiciest, sweetest local melons. They are so much nicer than the pale flavorless early-season melons—often imported cantaloupes and honeydews—I’m sometimes offered to give to my toddler. It seems especially  worth holding out for some of the wonderful heirloom varieties grown by our regional farmers: the aptly named Ambrosia, as well as Sharlyns, muskmelons, Charentais, and of course the classic crisp juicy watermelons in a range of colors, to name just a few. Although melons are famously paired with prosciutto or other hams, I admit that I usually just cut them in half, scoop out the seeds, and slice them thinly with the skin still on. Then I lay them out on a plate or platter in a pretty pattern and offer plenty of napkins for sticky hands.
 Late summer is apple harvest time, and I am lucky to live in a house with three apple trees in the backyard. My family and I love to watch their annual cycle, from the bare branches of winter, to the season of tiny buds and then fairy-like blossoms, to the time of little spring leaves, and then young clusters of small fruit in summer. This time of year, when the trees are loaded with ripe, full fruit, we battle the squirrels to get first pick! In addition to enjoying eating apples straight out of hand, I still love them with peanut butter as I did in my childhood. My current favorite method is to eat them with a slice of aged Cheddar. While there are lots of lovely farms growing apples, my favorites include Flatland Flower Farm, Pomo Tierra Ranch, and—of course—The Apple Farm near Philo, which also makes fabulous apple syrup, hard cider, cider vinegar, and even apple balsamic. It was at a weekend workshop there with the inimitable Sally Schmitt that I tried my first Pink Pearl apple (not to be missed—the flesh is a pale rosé), and learned to make a savory apple sauce with butter and thyme that is delicious with pork.
Although not quite as glamorous as tomatoes, sweet peppers, in their cascading rainbow of colors at the famers markets, are  nearly as irresistible. Many of us grew up eating imported bell peppers, but the peppers we’re now finding most abundant at Bay Area markets are a smaller sweet variety called Gypsy. They range from green-yellow to orange-red, and are thinner-fleshed, less pithy, and longer in shape than their boxy bell cousins. You can use them in any way you would use a bell: stuffed and baked, fire-roasted or grilled, sautéed or stewed. They are wonderful mixed with their mild or spicy cousins, be they jalapeños, poblanos, Anaheims, or (of course) bells. Gypsies lend themselves to almost any cuisine, including German—they’re great added to cabbage and then cultured. At the kitchen last year a case of overflow peppers inspired me to write a recipe for “Peter Piper’s Kraut”—a memorable flavor combination that just screamed to be eaten on a Philly-style cheese steak sandwich.
Jessica Prentice is the author of Full Moon Feast: Food and the Hunger for Connection and co-founder of Three Stone Hearth Community Supported Kitchen in Berkeley. www.threestonehearth.com
Line drawings are by Sarah Klein (sarahklein.com), with coloring by Maggie Gosselin.
Peter Piper’s Kraut
Culturing vegetables like cabbage with salt produces lactic acid and lots of beneficial bacteria, creating a probiotic health food that can improve digestion and build immunity. While krauts can be made in almost any vessel, I prefer to use a specially designed German sauerkraut crock made by Harsch. It comes with fitted stones that weigh down the kraut, and the lid features a moat that acts as an airlock, letting air out as fermentation happens but keeping molds from entering. If you don’t have one of these handy crocks, you can use a bucket, pot, large jar, or almost anything that will hold the cabbage. The Harsch crocks are designed to culture the vegetables over the course of about five weeks, but I find that this is sometimes too long for other vessels—the liquid evaporates and mold can form on top of the kraut. This doesn’t ruin the kraut underneath—just scrape off the top and then transfer the good kraut to jars and put them in the fridge. Eaten in midwinter, this kraut is a lovely reminder of the harvest season!
Yields about 1 gallon
6 pounds green cabbage
2 pounds peppers (Gypsy, bell, poblano, or other)
¼ to ½ teaspoon chipotle powder, if available
¼ teaspoon smoked paprika
¼ to ½ teaspoon red pepper flakes (optional)
½ teaspoon ground allspice (“jamaica pepper”)
½ teaspoon ground black pepper
1 tablespoon minced garlic
¼ cup minced scallions
4 tablespoons sea salt, or as needed
Core, quarter, and shred cabbage finely. Sprinkle with sea salt and massage or crush the cabbage with your hands to begin to bring out the liquid. Set aside.
Slice peppers into very thin strips, discarding the seeds. Add peppers and all remaining ingredients to cabbage, and mix to toss thoroughly. Taste and adjust salt (it should taste saltier than you would like at this stage), and add more spice if you like.
Pack into a 5-liter sauerkraut fermentation crock, or a 1-gallon bucket or pickle crock. Weigh down the kraut using the stones that come in the crock or a plate with something heavy placed on top.
Unless the cabbage has released LOTS of liquid, you will need to add enough brine to submerge the cabbage entirely. Make the brine by dissolving 2 tablespoons sea salt in a quart of filtered water. Pour over the kraut to cover the plate or stones by at least ½-inch of liquid. Cover with a cloth or with the fermentation crock lid.
Allow to ferment for 2–5 weeks. The time it takes will depend on your fermentation vessel as well as how the kraut looks and tastes. When it’s ready, transfer to mason jars and refrigerate.